Mfr Part # DFR0888-24
WS2812-24 RGB LED RING LAMP
DFRobot
License: See Original Project 3D Printing Addressable LEDs
Want to build your own superhero-style Arc Reactor?
Get ready to combine engineering, electronics, and a bit of soldering to bring it to life! This project uses 3D printed parts, addressable LEDs, and simple programming with WLED to create an awesome, glowing Arc Reactor.
Don’t worry—I’ll walk you through everything, including how to use WLED when we get to that step.
Let’s get started!
The first step is to get the electronic parts ordered from DigiKey. Here is a mylist cart with the components.
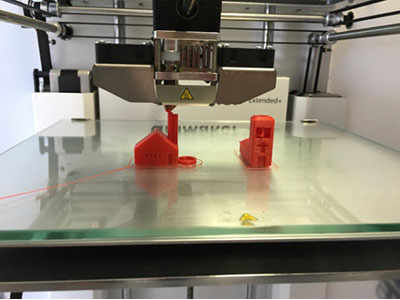
While the parts are in transit, it would be a good time to start 3D printing the parts needed to assemble the Arc Reactor. Here is a link to the file: https://www.printables.com/model/1262045-diy-wled-arc-reactor.
There are seven different pieces that need to be printed. The coil holder requires a quantity of ten pieces, while everything else will only need one of each.
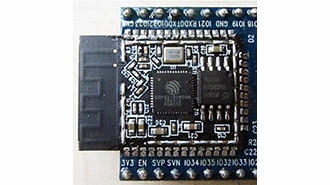
I like to get the soldering done and out of the way before building too much of my project. So, let’s start there. The SEEED Xiao board will need to be soldered to the Adafruit NeoPixel BFF. These two boards combined will have a seamless step into connecting the LEDs and WLED later in the project. As you can see, the two boards are the same size and shape and need to be soldered back-to-back with the connectors on the same side. Here is a before and after image.
The next step would be to solder the LED ring. The small LED ring will need a JST 3-pin cable soldered to it. Red wire to Power 5VDC. Black Wire to Ground. Green Wire to Data Input. This connector will need about 2 inches in length.
Now that that is done, put the large LED ring inside the clear ring holder. You can also add all 10 of the coil holders around the outside.
Here comes the fun part! This is a time-consuming process. You will need to cut the magnet wire into 3ft pieces and wrap it around the individual coil holders. There will be 10 of them in total. When you get to the end of the magnet wire, you will need to wrap it around the backside to secure it.
I would suggest taking a few breaks to fly your drone, program your robot, or research a new 3D print to save your fingers from being too sore. Once you get all 10 coils wrapped it will look like this.
Moving onto the next step, you can start to assemble the core similar to what you see below:
Place the core into the center of the arc aligning the 3 screws to the holes in the arc. Tighten the bolts. It is OK if they seem a little loose. They will tighten into the core LED assembly.
Flip the entire thing over and place the center core LED ring assembly onto the three bolts that are sticking through.
Connect the LED wire to the OUT connector on the outer LED ring.
Now we need to attach the SEEED Xiao board to the rear housing of the Arc Reactor. You will need to glue in the SEEED board with the connectors facing outward. I suggest either super glue or a hot glue gun.
The antenna has removable 2-sided tape on it to stick it down. You can stick it anywhere on the inside of the housing.
Now it’s time for final assembly and onto the programming. In the final assembly, you will need to attach the JST connector from the SEEED board to the DIN on the large LED ring. Then you can snap the rear housing together with the main arc. This might take a little convincing, but it will go together.
Onto the programming. For this project, we will be using WLED to drive the LEDs and give them animation, color, and preset functions.
WLED is an open-source software that allows you to control addressable LED strips (like WS2812B, SK6812, etc.) using a web interface, offering a wide range of customizable lighting effects and integration with smart home systems. It works with most ESP32 development boards. Which is why I decided to use the SEEED Xiao board. It is small yet powerful and has built-in Wi-Fi using the ESP32. Once programmed, the Xiao will create its own Wi-Fi network that you can connect to with a computer, phone, or tablet to control the Arc Reactor.
To get started, you will need a data cable connected to your computer, a Chrome-based browser, and your SEEED Xiao board. Navigate to https://install.wled.me/ on Chrome. With the board connected, click on install.
You will then be asked to select a serial port. In my case, it is the third option. The click Connect.
Click Install WLED
Confirm Installation by clicking Install again.
Success!! It was really that easy to install this amazing software. Now that it is complete, you will need to click next but SKIP the flowing steps in the installation window. We can move on from the computer.
On your phone, tablet, or computer you will need to connect to the Wi-Fi network the SEEED Xiao is broadcasting.
The network will be WLED-AP
Password: wled1234
Once connected, you will see the user interface pop up automatically.
Click “To the Controls”
Then Click Config
Then LED preferences – This is where we will tell the device what data pin we are using and how many LEDs are on our two LED rings.
When you scroll down, you will see length set to 30. This will need to be changed to 42 which is how many total LEDS are combined between our two rings. The data pin is set to 2 which needs to be changed to 10 which is the I/O pin we used on the SEEED Xiao board.
Be sure to click save when done or you will have to re-do this portion. You should see your Arc reactor light up (usually orange).
Now we can go to the settings and have some fun! For the Arc reactor, I prefer the “Breathe” effect with “Cloud” colors, but this is where you can get creative.
I also like to add a preset right away so that every time it powers on it will have the animation I like. If you click Presets, then you can save it to the default. If you notice the apply at boot is already checked off. This will run this specific preset when the device boots.
There you have it; you have successfully created your own Arc Reactor. Now it is time to get creative and see what colors, animation, and add-on designs you can create for this device!
Great work.